

So you’ve just picked up your local barn find. She doesn’t look as bad what the advert photos suggested. A bit of grease here, some rust and pitting there, but nothing that can’t be fixed with a little bit of TLC – besides, you plan on stripping the bike down and turning it into a custom ride at some point anyway.
The only problem is you haven’t heard or seen it run. Of-course the seller assures you “it used to run”, or says it was “a daily rider” but hasn’t started in X years. We’ve heard it all before.
You do your checks – you find some grease underneath but nothing terminal, throw the bike into 5th and you have the engine turning over (she’s not seized up).
It’s a deal! You’ve scored a bargain.
Fundamental Checks
The chances that you’ve found yourself a bargain barn-find that won’t start is highly likely. There are a number of reasons for this that range from; old fuel gunking up, O-rings shrinking or swelling, lack of maintenance and out of adjustment in the valves and/or the carbs (carburettors) , old spark plugs and more. Note that it could be any combination of these, and to have a well running engine, all of them will need to be addressed. We prefer to do this before we start any new custom motorcycle build.
That is, we always go through the process of checking, recording and tuning an engine before any serious strip down. This so that we’re confident the bike will run as expected when the build is complete. If you don’t go through this process you leave yourself open to second guessing whether you’ve done something wrong or whether it was like that before you stripped the bike.
Always keep in mind that the fundamentals of engine running is air, fuel and spark. The engine and its mechanisms combines air and fuel, compresses it within the cylinder, and ignites the mixture using spark within each cylinder. The correct delivery of air and fuel is critical to smooth engine operation, but so are the electrics, as well as when and how well this mixture is ignited.
Follow the below step by step checks and adjustments each time you commence a new build. Especially if it’s a vintage bike:
Observe:
The first thing you should aim to do is figure out the condition of the engine. Take baby steps when doing this. Try to determine if what the seller has told you about the bike is true.
Step 1: Check for any oil leaks and or sweats (an oil sweat is not a leak but a slight film of oil at the site of a join/gasket/o-ring etc), and try get a gauge on how severe they are. There are some oil sweats that appear after a bike has been sitting around for a long period of time. This is because rubbers, plastics and other materials contract because of the lack of heat expected during normal operation.
It is possible for an oil sweat to completely disappear after some hot running of the engine. An oil leak on the other hand is probably not going to disappear and you’ll need to either live with it or fix it, but this depends on what the aim of the bike is (is it a custom build, a daily, a vintage bike that you plan on riding for a while before tearing down etc.).
Step 2: Check that the engine turns over (if you haven’t already), and listen for any unusual noises. You can do this by propping up the rear wheel and shifting the bike into the highest gear, then simply turn the rear wheel. The reason we do this in the highest gear is because it lets you turn the engine with the least amount of resistance. You should be able to turn the rear wheel by hand with a little bit of force, and listen out for any strange noises or feel any vibrations or binding up. Selecting up through the gears manually will also let you see if the gearbox is operational.
Step 3: Remove the spark plugs and inspect them. They’ll reveal how the bike was running before it stopped running altogether. Check out the chart below:
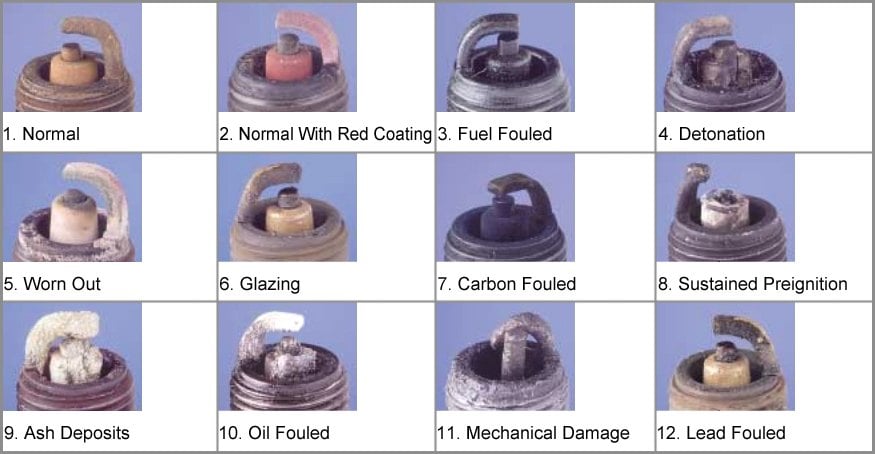
We typically see 3. Fuel fouled, or 7. Carbon fouled. These are usually attributed to the problems with the fuel and air supply, or the plug and ignition leads. Items 8 to 12, and 4 can indicate something more sinister and you’ll need to dig deeper. We won’t venture into this kind of detail in this article, so all about spark plugs will be revealed in the future.
Step 4: Once the spark plug is removed you’ll also be able to inspect a portion of the cylinder and piston head. It’s worth shining a torch and having a look, or even better if you have a borescope you can take a look up nice and personal. Assess for any unusual damage, wear or pitting etc.
Record Values:
If you’re satisfied that the engine should start, but isn’t, then move on to get some values and start making some adjustment. Do this with the fuel tank off for the time being. We don’t want the engine sputtering and firing at this stage.
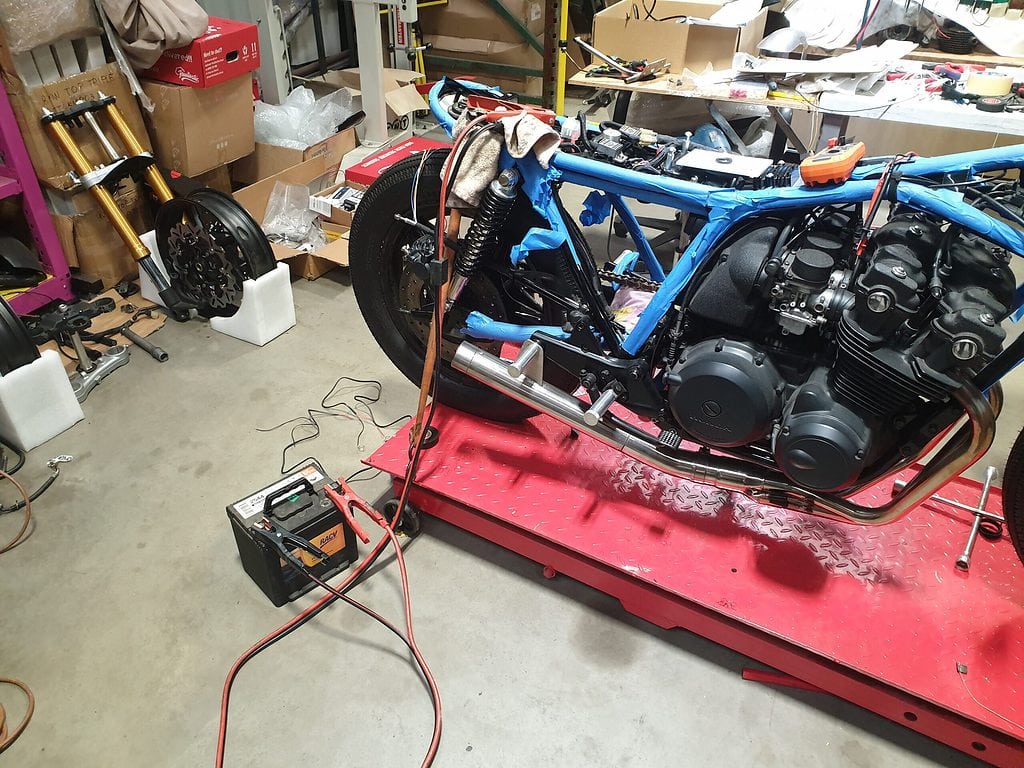
Step 5: Check the battery voltage, or get a new battery – be mindful that if you plan on using a lithium battery that it won’t last long during testing. Get yourself a car battery or something similar to provide enough volume to do the necessary tests.
Step 6: Assuming your wiring loom is intact and operational you should be able to press the engine start button and get your starter motor to begin turning the engine over. If this doesn’t happen, then either your circuit is incomplete (blown fuse, or severed wire), your starter motor solenoid is faulty, or you need a new starter motor. If you’re suspecting a fuse, then replace it and see what happens. If you have replaced the fuse and you still can’t hear the starter motor solenoid click, then bypass it by directly connecting positive to the starter motor positive cable.
If your starter motor is in an acceptable condition it should turn over.
Step 7: With the starter motor turning over you can begin taking compression values. Keep in mind this is your first take (we haven’t touched the valves yet).
Remove the spark leads and plugs and check each cylinder individually with a compression gauge. Your bike is likely to be old and worn. It probably won’t achieve the compression figures cited in the workshop manual. Usually, 80% of mid-range is acceptable.
So for example a Honda CB350 should have compression values of 160-180 psi. 170psi is the mid-range and we usually suggest that 80% of that, or 135psi is acceptable. Note that these are cold figures (bike has been left to cool for at least 24 hours – or in your case a very many 24 hours).
When doing the test be sure to open the throttle wide open. Or remove your old carbs altogether so you can install new ones later on if you’re heading down that direction.
You should also do this test wet. This means you’ll need to drop a bit of oil through the spark plug bore. The oil will provide better sealing between the piston rings and the cylinder, and mimic a lubricated system. Since the bike has been sitting for a long time it’s unlikely to have a lot of oil around the cylinders.
The other very important consideration is that all the cylinders should be consistent. A variance of about 5% is acceptable, but big differences in values between cylinders could mean excessive wear in a cylinder, a piston ring failure or a burned or bent valve.
When you record these values you’ll come to an idea about what kind of life the engine has had. Hopefully the variances aren’t too great.
If they are, or the compression readings are shockingly low then a rebuild may be necessary. To determine that we’ll need to continue our assessment.
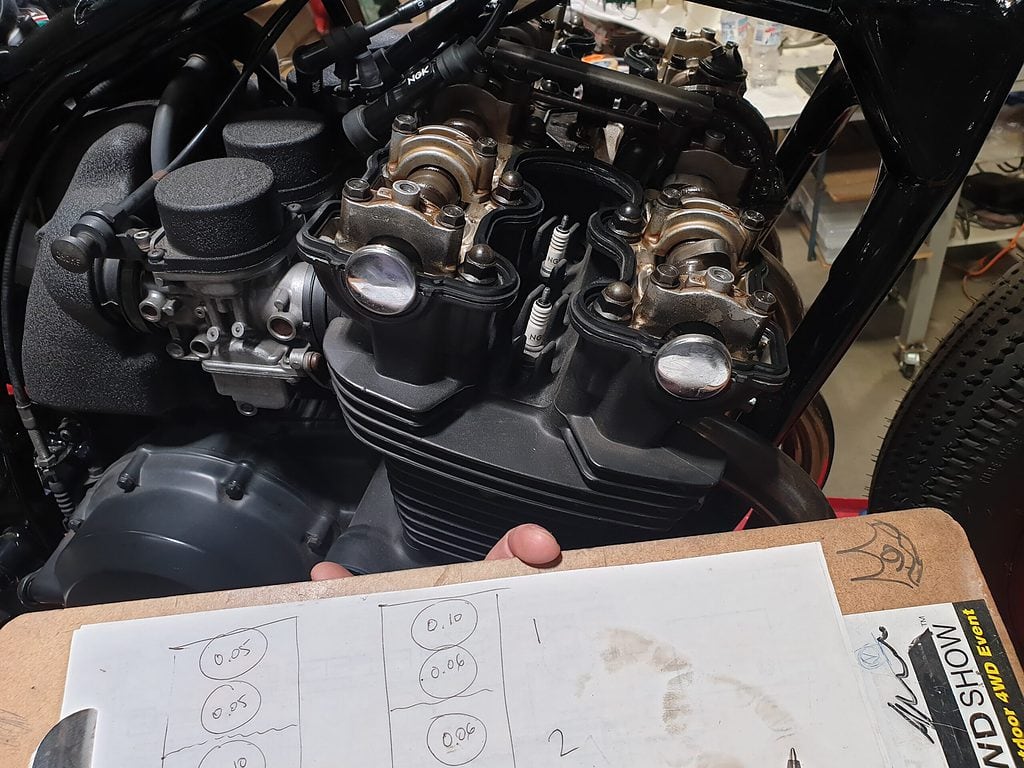
Step 8: Check the valve clearances and record them all (we’ll be adjusting later). This is critical and could be what’s causing any low compression numbers. Depending on your bike and configuration you’ll need to determine the firing order, and record the clearances for the valve tappets or shims. You’ll have the exhaust and intake sides to check. This is done for each cylinder on the compression stroke when the piston reaches top dead centre (TDC). To do this you’ll probably be turning the engine over at a bolt behind the alternator cover. Be sure to read your workshop manual for the exact procedure and the clearance values required.
Note that the clearances for some bikes can be very tight and your feeler gauges are very thin. When sliding in and out be sure that it’s as perpendicular to the valve as possible. You want to feel a little bit of drag when sliding the gauge in and out.
Step 9: Check the condition of your ignition coils. This can be done with a multimeter by checking the resistance between positive and negative terminals on the coils for the main circuits. Check the values in the workshop manual to determine what values you should be seeing.
You can also visually inspect the spark and intensity of the spark plugs (recommend using new plugs for this) by grounding it and observing a spark. If you lack a spark when firing the bike but your coil circuits check out, it could be ignition coil lead that is faulty or the connection to the new spark plug. Just be sure that you don’t have any fuel vapour nearby when doing this test.
Make the adjustments:
Now that you know what you’re working with, it’s time to make some adjustments, retest, and hopefully get the engine running again nicely.
Step 10: Adjust the tappets and shims according to the workshop manual. The workshop manual will give you a range to be within (if you are doing this with shims then take your time. You can swap some shims over to other locations to get within the required range but you probably won’t have all them – you’ll need to buy some).
It’s also worth mentioning that the ranges for exhaust and intake valves adjustments found in your manual may not be ideal. We recently encountered this when doing the shim adjustments for our 1981 Honda CB750 F Build. Almost 40 years of knowledge and experience by enthusiasts found that the original specification that Honda revealed burned exhaust valves because they were too tight. Furthermore, there are some older engines that were designed on leaded fuels. The lead in the fuel cooled things down, and because we no longer have leaded fuels it’s worth considering going to the upper end of the range when doing the adjustments. Alternatively, you could get an additive that you add to the fuel each time.
Now that you’ve dialed in your valve adjustments you can be sure to get the most out of each of the cylinders. It’s also worth checking that the cam chain is within spec so read your manual on how to check this. If it is, you’ll need to adjust it accordingly at the final step to ensure the engine purrs along nicely and consistently. If it’s excessively worn, you’ll need a replacement.
Re-doing the compression test should reveal an improvement in numbers if your valves were out of adjustment. If they don’t and your numbers are low or inconsistent between cylinders, then it’s probably time to accept that there may need to be a partial tear down of the engine at the very least.
Step 11: Fit new spark plugs and ignition coils if needed, then move onto the fuel and air delivery system. It’s likely that you won’t need to do any adjustments here if everything is new, but if you like you can work to get the most optimum spark by adjusting the spark plug gap.
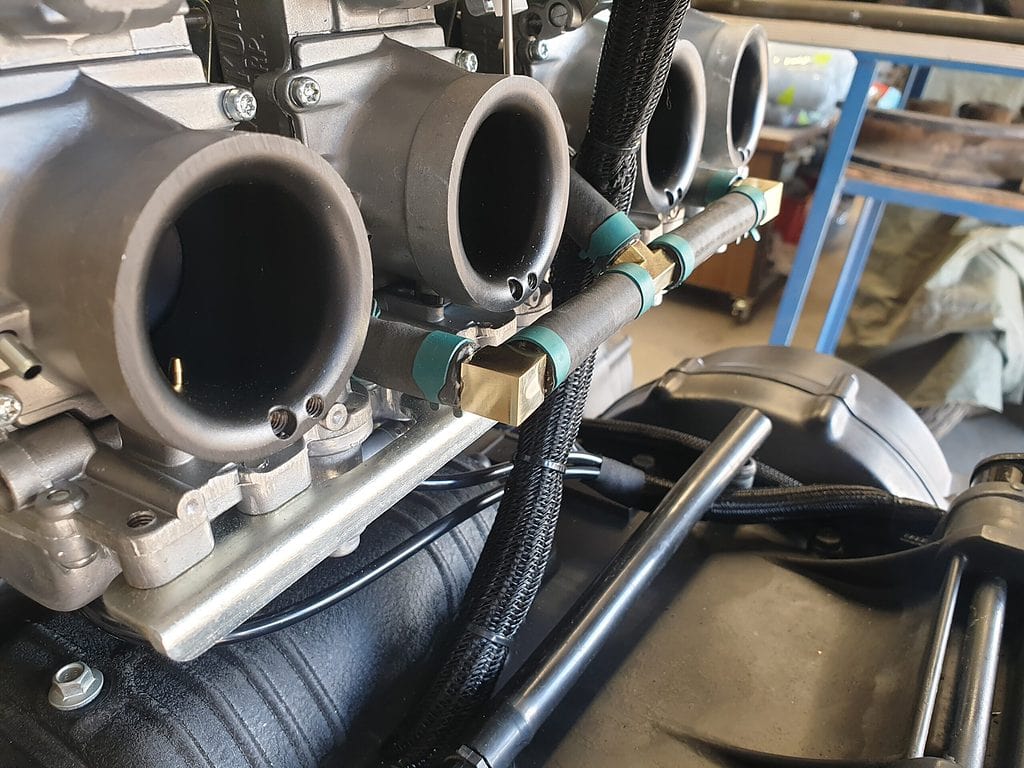
Step 12: You’ll need to think about what to do with the old carbs. You can either rebuild them, send them out to get rebuilt, or purchase aftermarket carbs that will breathe better and provide better performance. Sending out your carbs to get them rebuilt can be expensive because of the time involved in doing them. We almost always opt for fitting new carbs for custom builds if we can. Therefore, right from the get-go we can start adjusting them for the optimum air and fuel delivery.
We won’t discuss adjusting carbs here as we’ll need a dedicated article for it, but just know that without this you won’t get a smooth running bike.
Fine Tuning:
Step 13: Fine tune the engine performance by adjusting the timing. Depending on the age of your bike you’ll have different ways of doing this. It’s also worth noting that here we’re talking about valve timing and ignition timing.
For valve timing, this means adjusting the tension on your cam chain to ensure the valves open and close when required. Excessive cam chain slack that can’t be adjusted will cause the valves to open at slightly the wrong time, it could also cause excessive wear or even slip, potentially resulting in valve-piston strike. Provided your chain is within spec, most bikes have automatic adjuster, so all that’s left to do is back it off and re-tighten. If you still suspect excessive slop in the cam chain then it needs to be changed.
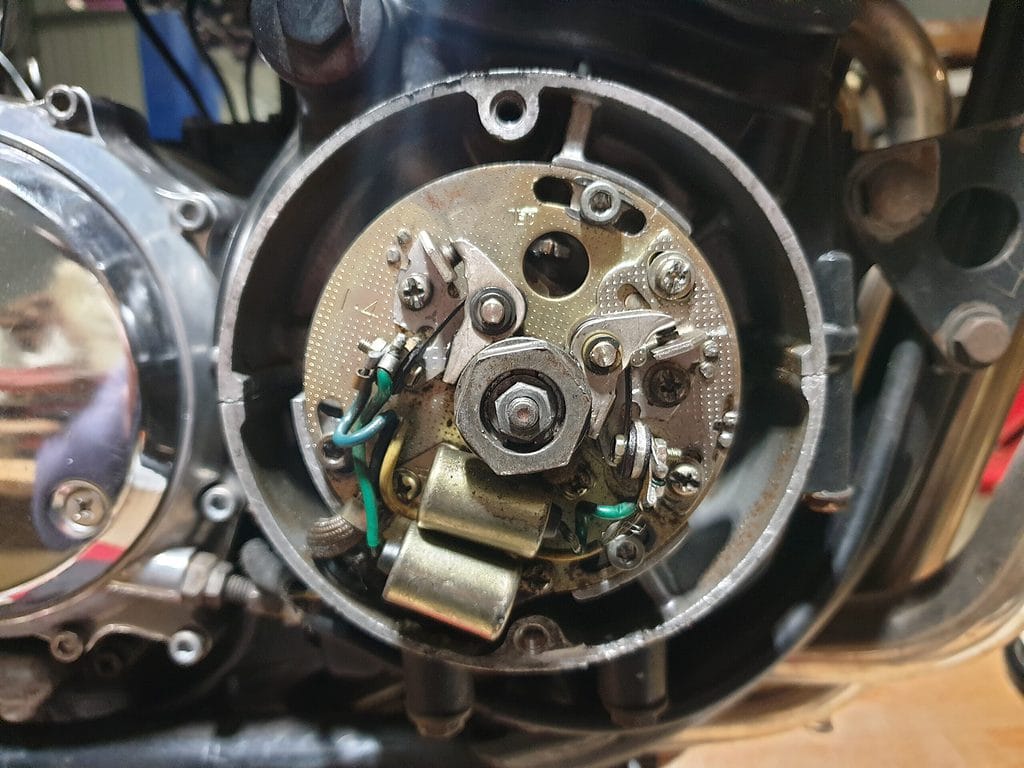
For ignition timing, be sure that you’re within the required limits to ensure the most power is utilised. This means that your spark should fire slightly advanced (so before the piston reaches top-dead-centre). But don’t go too far, or you’ll induce knock, which is when the air-fuel mixture burns before and wants to push back against the rotation of the piston. Older bikes like CB750’s usually have a timing cover indicators and a base plate. By using a timing light, you can dial in exactly when you want that spark to happen.
If you don’t set your timing correctly and it’s retarded, you’ll experience less power because the piston has already started moving downward.
Note that ignition timing adjustment is only really feasible at home if you’re working on an older bike. Newer bikes that have hall effect-sensors and ECU’s will alter their timing based on the position of the crankshaft.
Step 14: Once the carbs are on and set for tuning, the bike should run (assuming compression is fine, and you either rebuilt or installed new carbs). It’s likely that it’ll be rough running and this is because the carbs will need tuning and syncing (idle, mid and high range). The procedure for this will be different depending on the carbs you have fitted so be sure to check the owners manual for these. We will provide an overview on tuning carbs – but that’ll be a separate article.
You should look at getting a set of good vacuum gauges that will help sync all the carbs. Alternatively, you can get a Carb Tune Pro – it’s worth the money even if you’re a mild enthusiast we assure you.
Step 15: Test Ride – Be sure that you test ride your bike by taking it around your garage/workshop. Don’t go too far in-case you need to walk back. This means traveling at varying speeds, accelerating, decelerating and listening to any strange noises or vibration. Once you’re confident the engine is running at 100%, only then should you commence tearing it all down and starting a custom motorcycle build. This is to avoid any false positives / negatives when you add your new loom to the machine.
Getting to know your bike
To get to know your bike you should do the following at the very least:
- Buy or download a workshop manual and a colour coded wiring diagram.
- Find an online forum and join it. There is a wealth of information that comes through via experience of others that have done it before and know the in’s and out’s of the bike. Be sure that the forum has active members.
- Search it up on Youtube. There are more videos on Youtube than we can all watch in our life-times. Chances are someone has documented something about your bike or possibly done an entire re-build or custom and made a vlog of it.
Where to from here.
Each build is different, and every bike has its own personal history. Whilst that may be the case you can still check out our other technical articles or build blogs for inspiration, tips and tricks and so on. Simply go through the blog section of our website, or get in touch by sending us an email by using one of our contact forms on our site.